Amaryllis
Why Is My Amaryllis Bulb Not Growing?
The short answer
First confirm whether the bulb is waxed or planted in mix, when it was started and whether it is still firm. A recently started bulb or one kept too cool may simply be slow. A rooted or newly potted bulb needs drainage and restrained watering until growth increases; an intact waxed bulb is not watered. Softness, a collapsing neck or spreading decay warrants investigation rather than more water.
A firm bulb showing little change after planting needs a different decision from a bulb that is softening in wet mix. Check the product, start date and growing conditions before trying to force a response.
Diagnostic snapshot
What to check before you act
What you are seeing
- Firm bulb started recently
- Firm bulb in a cold position
Check first
Read the label and record the start date, not just the purchase date. A dormant bulb, a pre-started display and a previously waxed bulb have different histories.
Hold off for now
Do not soak a stationary bulb, add fertiliser to trigger shoots or repeatedly dig it up to check roots.
Investigate further if
Ask the supplier for a bulb-specific assessment once the stated expected window has passed under appropriate conditions, or sooner if a recently supplied bulb is softening. Spreading tissue breakdown or a collapsing neck needs prompt reassessment. Keep the label, dates and photographs; lack of visible growth alone cannot establish viability or identify a pathogen.
Photograph this before you act
- Photograph the soil surface and root-zone or container context; do not disturb roots just to take a photo.
- Take one close-up of the clearest symptom and one wider view that shows the surrounding area for comparison.
Next best check
Check two visible clues before you act.
This mini-check narrows the match using the same canonical diagnostic clues as this answer. It does not confirm a diagnosis from one or two clicks, and it does not make a photo-only diagnosis.
Two quick observations can tell you whether to keep reading this diagnosis closely or compare other possibilities first.
Choose the right situation
| What you see | What it may mean | Next useful step |
|---|---|---|
| Firm bulb started recently | Visible growth may not have developed yet | Compare start date and preparation with supplier instructions |
| Firm bulb in a cold position | Growth can be delayed by unsuitable conditions | Measure the position and provide appropriate gentle warmth |
| Persistently wet mix with softening tissue | Deterioration may be involved | Stop adding water and check drainage; seek assessment |
| Green tips emerging from the neck | The bulb has started growing | Continue appropriate care and watch progress |
| Leaves present but no flower stalk | Growth is occurring | Use the leaves-but-no-flowers pathway |
Check before changing care
- Read the label and record the start date, not just the purchase date. A dormant bulb, a pre-started display and a previously waxed bulb have different histories.
- Check accessible bulb tissue gently, the neck and the pot outlet. Dry papery outer scales are different from soft or sunken fleshy tissue; do not cut the bulb open or pull out roots to test it.
- Check light, actual room conditions and moisture in accessible mix. A radiator-heated shelf, a cold pane and a bright warm room are different situations. Photograph the neck from the same angle to detect small changes.
What to do now
- For a firm bulb still within its expected starting window, correct the growing position and observe. Flowering commonly takes several weeks and supplier preparation affects timing; a flower timetable is not a precise shoot-emergence deadline.
- Put a newly started potted bulb in good light with suitable room warmth, away from direct heating and cold glass. Penn State notes that these bulbs do not need a chilling treatment before forcing.
- Keep drainage open and the upper bulb exposed according to reliable potting instructions. After initial potting care, supply only the water justified by the mix and limited growth; never keep a barely growing bulb continuously saturated.
- If it is intact and waxed, follow waxed care instead of applying the potting instructions. For a previously unwrapped bulb, assess the base and rooting separately.
- When green tips or leaves appear, continue suitable light and adjust watering to actual growth and drying. A leaf appearing before a flower is a change of pathway, not proof that growth has failed.
- If the bulb softens, smells bad or develops spreading decay, separate it and contact the supplier or a horticultural adviser. Photograph it before making destructive cuts or discarding a recent purchase.
GardenSolved checkpoint
Do not do this yet
- Do not soak a stationary bulb, add fertiliser to trigger shoots or repeatedly dig it up to check roots.
- Do not refrigerate a healthy newly purchased Hippeastrum as though it were a tulip, or discard a firm bulb after an arbitrary few days.
Confirm the likely cause first, then choose the treatment.
Timing and important distinctions
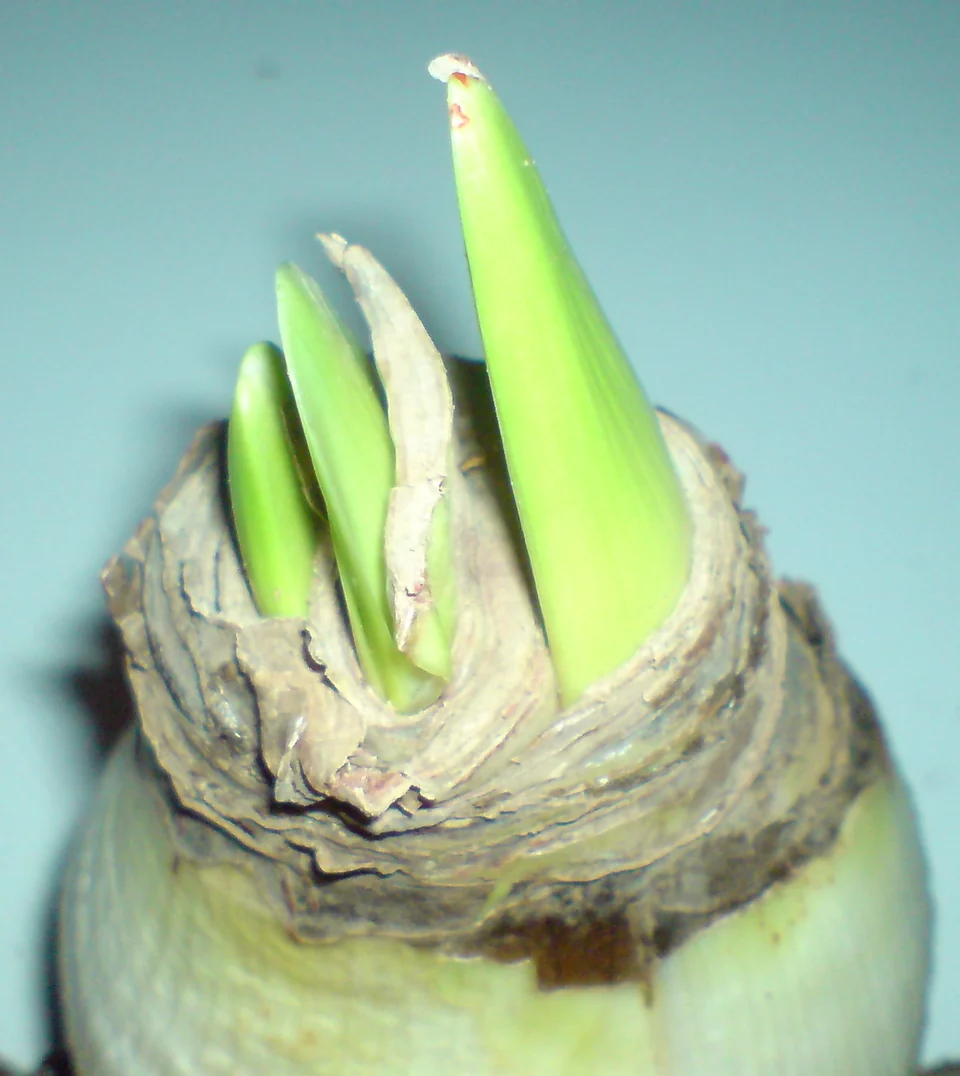
The photograph of an emerging bulb shows what new green tips can look like. It is not a documented failed bulb and cannot prove why your bulb has not started.
There is no universal seven-day test. If suitable conditions and the supplier's expected window have passed without change, the bulb's history and condition matter more than repeatedly resetting its care.
When to ask for help
Ask the supplier for a bulb-specific assessment once the stated expected window has passed under appropriate conditions, or sooner if a recently supplied bulb is softening. Spreading tissue breakdown or a collapsing neck needs prompt reassessment. Keep the label, dates and photographs; lack of visible growth alone cannot establish viability or identify a pathogen.
Choose your next step
Sources and linked claims
Save & recheck
Compare what changes before changing course.
Save this diagnosis only in this browser, then come back and compare the same clues. No account, reminder subscription, or server-stored diagnostic record is created.
Your baseline
- Firm bulb started recently
- Firm bulb in a cold position
Check again when you return
- Read the label and record the start date, not just the purchase date. A dormant bulb, a pre-started display and a previously waxed bulb have different histories.
- Check accessible bulb tissue gently, the neck and the pot outlet. Dry papery outer scales are different from soft or sunken fleshy tissue; do not cut the bulb open or pull out roots to test it.
Tip: photograph the same area from a similar angle so the visible pattern is easier to compare.
Related questions
Diagnostic Finder
Still not sure this answer fits?
Open the Diagnostic Finder with the relevant growing subject or care context preselected and compare other published GardenSolved diagnoses.
Compare other possibilities