Poinsettia
Why Is My Poinsettia Dropping Leaves?
The short answer
Check the root ball and recent cold exposure before watering a poinsettia that is dropping leaves. A dry, light pot supports a water-shortage explanation; a wet, heavy pot calls for drainage and root checks. Separate falling green leaves from ageing coloured bracts, and inspect leaf undersides if there is stickiness or visible insect activity.
A newly bare stem tells you that leaves have been lost; it does not tell you why. Start with what fell, what the pot feels like and what happened before the loss began. A poinsettia arriving from a cold shop and one standing in water can both drop leaves, but need different responses.
Diagnostic snapshot
What to check before you act
What you are seeing
- The pot is unusually light and the accessible root ball is dry; wilting may have preceded leaf fall.
- Lower leaves yellow while the pot remains wet and heavy; water may collect inside its cover.
Check first
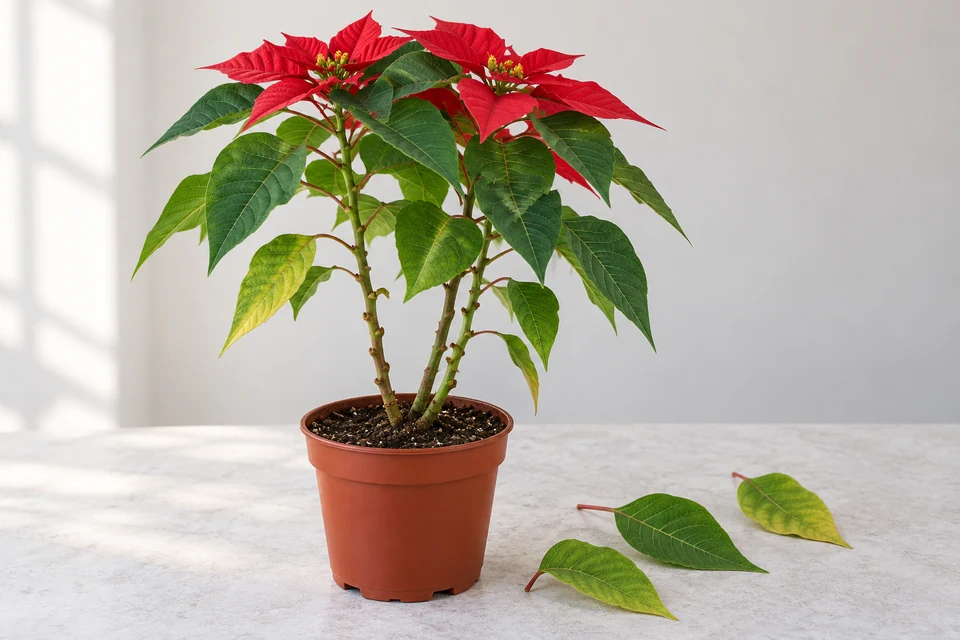
Look at one fallen piece and the corresponding stem. Green foliage and coloured bracts are leaves with different roles; the small structures in the centre of the bracts contain the true flowers. Note whether loss is mainly low on the plant, on one side or across every branch.
Compare first
- Dry-root stress
- Persistently wet roots
- Cold exposure or an unsuitable position
Hold off for now
Do not water or fertilise simply because leaves have fallen. Check the root ball and exposure history first.
Investigate further if
Seek a plant diagnostic assessment for rapid continuing loss with a soft stem base, collapsing shoots, spreading lesions or visible mould. Persistent loss after a clear environmental problem has been corrected also needs reassessment. Bring the timeline and whole-plant photographs; leaf colour alone cannot identify a pathogen.
Photograph this before you act
- Photograph the soil surface and root-zone or container context; do not disturb roots just to take a photo.
- Take a sharp close-up of the affected leaf and a second photo of the underside.
Recommended diagnostic check
Environmental Stress Checker
Does the timing or exposure fit environmental stress?
Compare the symptom pattern with recent growing conditions before treating a lookalike as disease, pests, nutrient deficiency, or a watering problem.
First check
Look at one fallen piece and the corresponding stem. Green foliage and coloured bracts are leaves with different roles; the small structures in the centre of the bracts contain the true flowers. Note whether loss is mainly low on the plant, on one side or across every branch.
Timing / exposure boundary
Loss began after purchase, transport, a cold window or a change in position.
Timing and exposure can support an environmental branch, but they do not rule out other causes. Use the factor labels and boundary above as clues, not as a diagnosis.
Match the situation before acting
Dry-root stress
- The pot is unusually light and the accessible root ball is dry; wilting may have preceded leaf fall.
Rewet the root ball through a draining nursery pot, then let it drain.
Persistently wet roots
- Lower leaves yellow while the pot remains wet and heavy; water may collect inside its cover.
Empty trapped water and follow the wet-root pathway if the plant is also limp.
Cold exposure or an unsuitable position
- Loss began after purchase, transport, a cold window or a change in position.
Remove the ongoing exposure and assess moisture separately; water cannot undo cold injury.
Pest clues or another active problem
- Live insects, sticky deposits, spreading lesions or a soft base accompany the loss.
Investigate the additional sign rather than treating leaf fall alone.
Safe checks before acting
- Look at one fallen piece and the corresponding stem. Green foliage and coloured bracts are leaves with different roles; the small structures in the centre of the bracts contain the true flowers. Note whether loss is mainly low on the plant, on one side or across every branch.
- Lift the same pot to judge relative weight. Touch the accessible mix gently, looking beyond a dry surface where possible, and lift the nursery pot from its outer cover. Check for collected water and real drainage holes without pulling the roots apart.
- Write down purchase, transport and recent moves. Inspect leaf undersides and branch junctions in good light. A pale margin, a curled bract or a white speck alone does not identify a deficiency or an insect.
What to do next
- Choose the branch supported by the checks. If the root ball is genuinely dry, use the watering guide. If it remains wet, remove standing water and assess drainage before supplying any more.
- Place the plant in bright daylight, away from cold glass, opening exterior doors and direct heat from a radiator or vent. Keep the position stable while you compare subsequent changes.
- Collect fallen debris, keeping track of how much fresh loss appears. Photograph the same branches and the pot together; this makes ongoing decline easier to distinguish from the damage already present.
- If insects or suspicious mould are visible, keep the affected plant apart from others and use the relevant identification guide. Do not shake branches to test whether more leaves will fall.
GardenSolved checkpoint
Do not do this yet
- Do not water or fertilise simply because leaves have fallen. Check the root ball and exposure history first.
- Do not strip healthy leaves or repot an otherwise firm plant just to investigate a few lost leaves.
Confirm the likely cause first, then choose the treatment.
What recovery can look like
- Fallen leaves will not reattach. The useful signs are reduced fresh loss, firm remaining shoots and, when growth resumes, healthy new foliage.
- A plant injured before purchase may keep shedding despite improved conditions. There is no reliable promise that it will refill its bare stems for the current holiday display.
When to get more help
Seek a plant diagnostic assessment for rapid continuing loss with a soft stem base, collapsing shoots, spreading lesions or visible mould. Persistent loss after a clear environmental problem has been corrected also needs reassessment. Bring the timeline and whole-plant photographs; leaf colour alone cannot identify a pathogen.
Important context
Some gradual loss of older leaves or fading bracts can occur as a display ages. Sudden widespread loss on a newly purchased plant deserves checks rather than an assumption that the Christmas season has ended.
Variegated foliage and curled bracts occur in cultivated poinsettias. Compare the original label or older photographs before calling a stable colour pattern a new symptom.
Follow the next useful clue
- The pot is dry or water runs around the root ball: Follow the watering and drainage checks.How Often Should You Water a Poinsettia?
- Leaves hang while the pot remains wet: Investigate the wet-root wilt pathway.Why Is My Poinsettia Wilting?
- Fresh dark patches are the strongest clue: Compare tissue injury with surface deposits.Why Are My Poinsettia Leaves Turning Black?
- Live white insects are visible under leaves: Identify whiteflies before choosing a pest response.How Do I Know If My Plant Has Whiteflies?
Sources and linked claims
Save & recheck
Compare what changes before changing course.
Save this diagnosis only in this browser, then come back and compare the same clues. No account, reminder subscription, or server-stored diagnostic record is created.
Your baseline
- The pot is unusually light and the accessible root ball is dry; wilting may have preceded leaf fall.
- Lower leaves yellow while the pot remains wet and heavy; water may collect inside its cover.
Check again when you return
- Look at one fallen piece and the corresponding stem. Green foliage and coloured bracts are leaves with different roles; the small structures in the centre of the bracts contain the true flowers. Note whether loss is mainly low on the plant, on one side or across every branch.
- Lift the same pot to judge relative weight. Touch the accessible mix gently, looking beyond a dry surface where possible, and lift the nursery pot from its outer cover. Check for collected water and real drainage holes without pulling the roots apart.
Tip: photograph the same area from a similar angle so the visible pattern is easier to compare.
Related questions
Diagnostic Finder
Still not sure this answer fits?
Open the Diagnostic Finder with the relevant growing subject or care context preselected and compare other published GardenSolved diagnoses.
Compare other possibilities